Domains & Publishing
Connect your own domain
Point a domain you own at your site, with free automatic HTTPS.
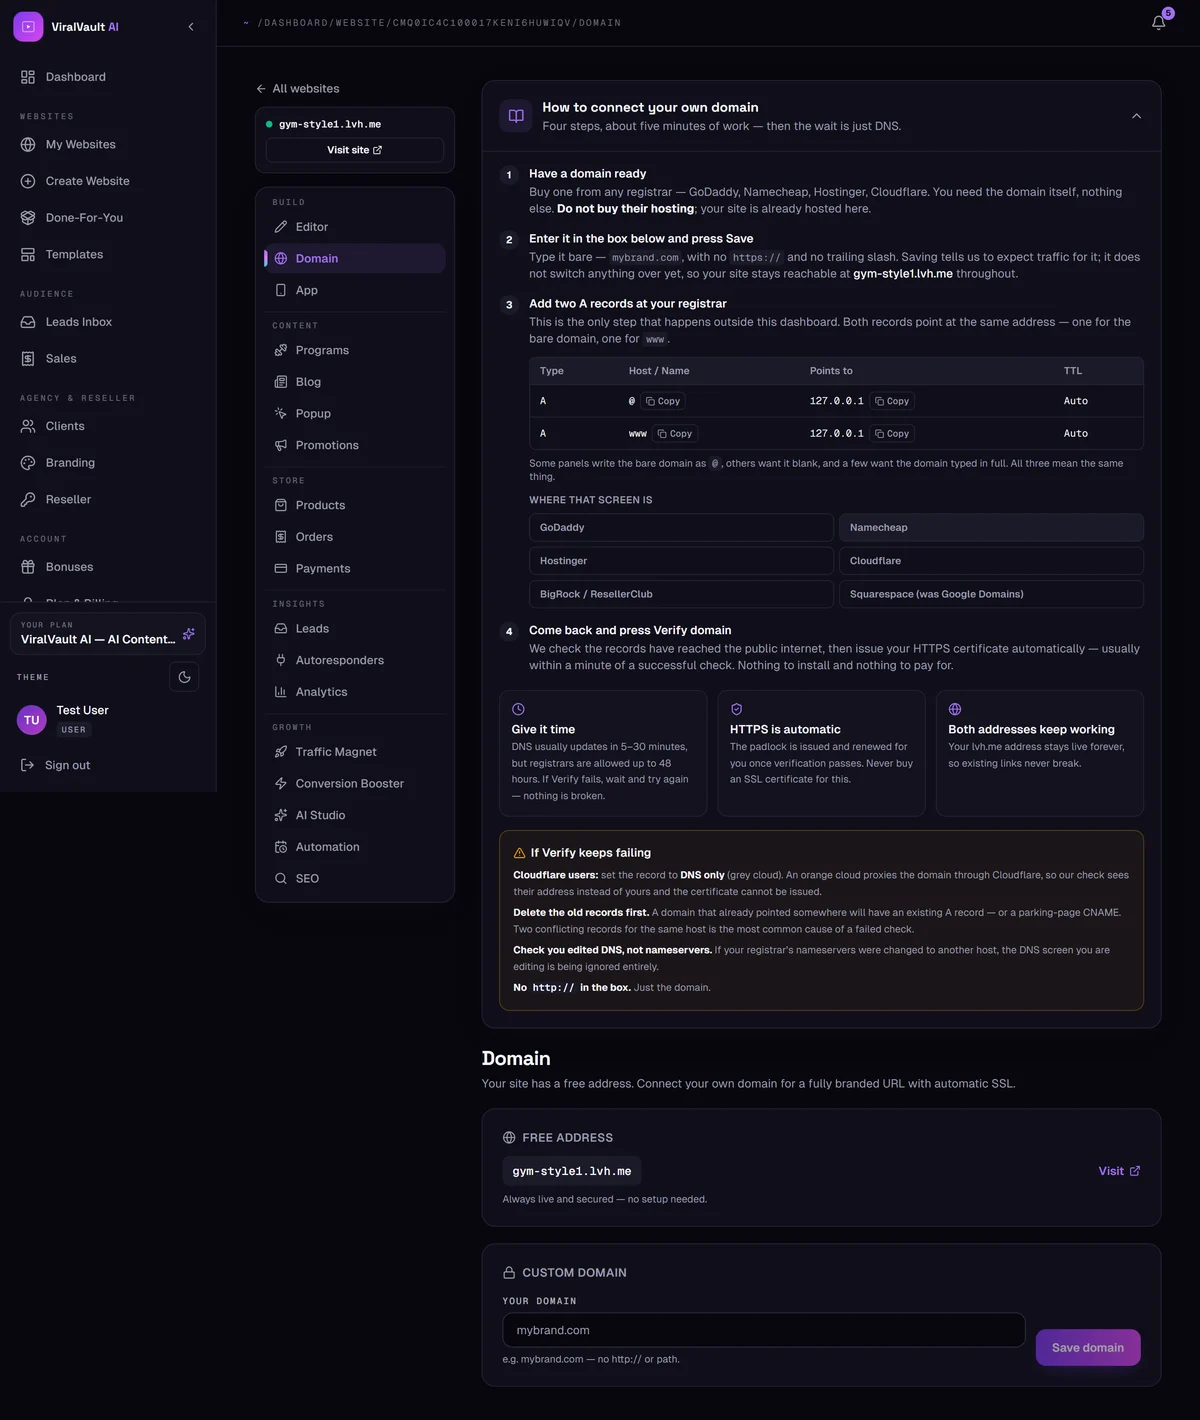
- 1
Buy a domain — nothing else
Get one from any registrar: GoDaddy, Namecheap, Hostinger, Cloudflare. You need the domain itself and nothing more.
Do not buy their hosting. Your site is already hosted here, and paying for hosting you can't use is the single most common mistake at this step.
- 2
Enter it and press Save
Open Build → Domain and type the domain bare —
mybrand.com— with nohttps://and no trailing slash.Saving only tells us to expect traffic for it. It doesn't switch anything over yet, so your site stays reachable on its free address the whole time.
- 3
Add two A records at your registrar
This is the only step that happens outside this dashboard. The page shows you both records with a Copy button on each — one for the bare domain, one for
www. They both point at the same address.Registrars disagree on how to write the bare domain: some want
@, some want the field left blank, a few want the full domain typed out. All three mean the same thing. - 4
Come back and press Verify domain
We check that the records have reached the public internet, then issue your HTTPS certificate automatically — usually within a minute of a successful check. Nothing to install, nothing to pay for.
Never buy an SSL certificate for this. The padlock is issued and renewed for you.
- 5
If Verify fails, just wait
DNS usually updates in 5–30 minutes, but registrars are allowed up to 48 hours. A failed check this early means the records haven't spread yet — nothing is broken. Wait and press Verify again.
- 6
Your free address keeps working
Both addresses stay live permanently, so any link you shared before the switch keeps working forever.
- 7
Using Namecheap? Change it in Advanced DNS, not cPanel
If your domain is on Namecheap and you also have their shared hosting, the DNS screen inside cPanel looks like the right place — but changes made there are ignored while Namecheap's own nameservers are in charge. Go to Domain List, click Manage next to your domain, then open Advanced DNS. That is the screen that actually controls where your domain points.
While you are there, check there is only one A record for your domain. An old record left behind alongside ours sends visitors to either address at random, so the site works for some people and not for others.